能做什麼,需要什麼
參考圖生成用 1~4 張圖片和一段指令產生一張新圖。指令中依加入順序用 <image-1>、<image-2> … 指稱圖片。
需要付費方案(Starter 以上)。每張 10 點數,每張參考圖再加 10 點數:1 張參考 20 點,2 張 30,4 張 50。被攔下或產生失敗時點數會退回。
本文中我們做了一個虛構的精華液瓶(品牌名 AURA 也是虛構的)和一個虛構的客廳,當作參考圖。如果是你自己的商品,請用你自己的照片。
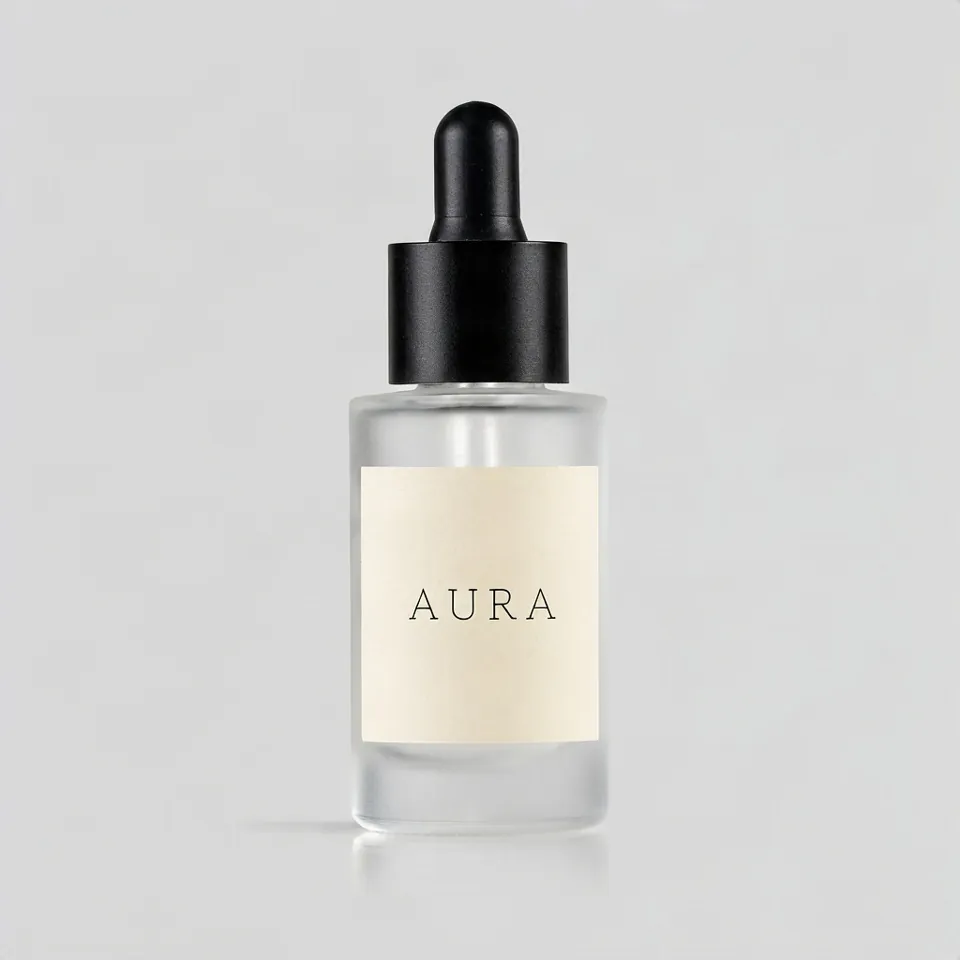
例 1:把同一個瓶子放進兩個場景
- 打開參考圖生成,加入瓶子照片,會顯示為
<image-1>。 - 貼上下面的指令。把不能變的東西(這裡是瓶形、瓶蓋和標籤)寫出來。
- 選擇比例(第一張方形,第二張直式),按「生成」。
我們用英文寫指令進行測試,下面是原文。
Put the bottle from <image-1> on a white marble bathroom counter next to a folded linen towel, soft morning window light from the left. Keep the bottle shape, the black dropper cap and the AURA label exactly as in <image-1>.Put the bottle from <image-1> on a dark wet rock by the sea at sunset, warm backlight, shallow depth of field. Keep the bottle shape, the black dropper cap and the AURA label exactly as in <image-1>.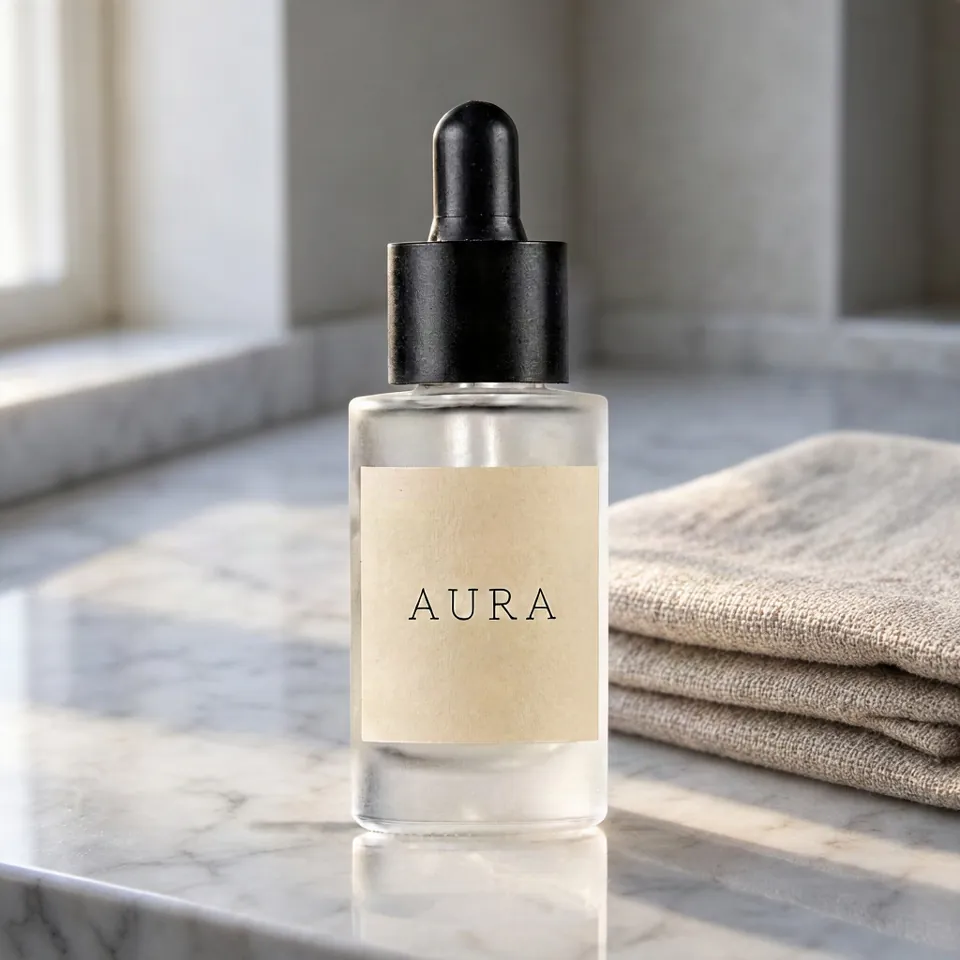
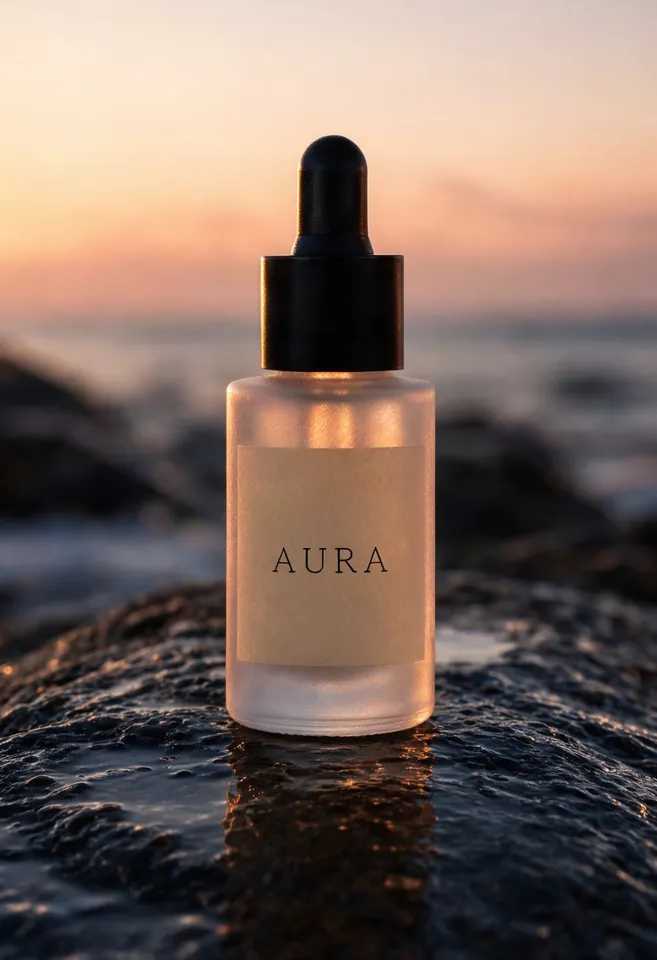
兩張圖中,瓶形、黑色滴管瓶蓋和 AURA 字樣都保留了下來。每張大約 20~30 秒。每次都從不同的亂數開始,所以同樣的指令結果也會略有不同。
沒做好 1:強光改變了標籤顏色
看夕陽那張的標籤:紙從淺奶油色變成了暖米色,因為夕陽的光也照到了標籤上。用在商品頁上,看起來像另一個標籤。
有效的做法:再加一句寫明顏色的話。
Put the bottle from <image-1> on a dark wet rock by the sea at sunset, warm backlight, shallow depth of field. Keep the bottle shape, the black dropper cap and the AURA label exactly as in <image-1>. The label paper stays the same pale cream as in <image-1>, not tinted orange by the sunset.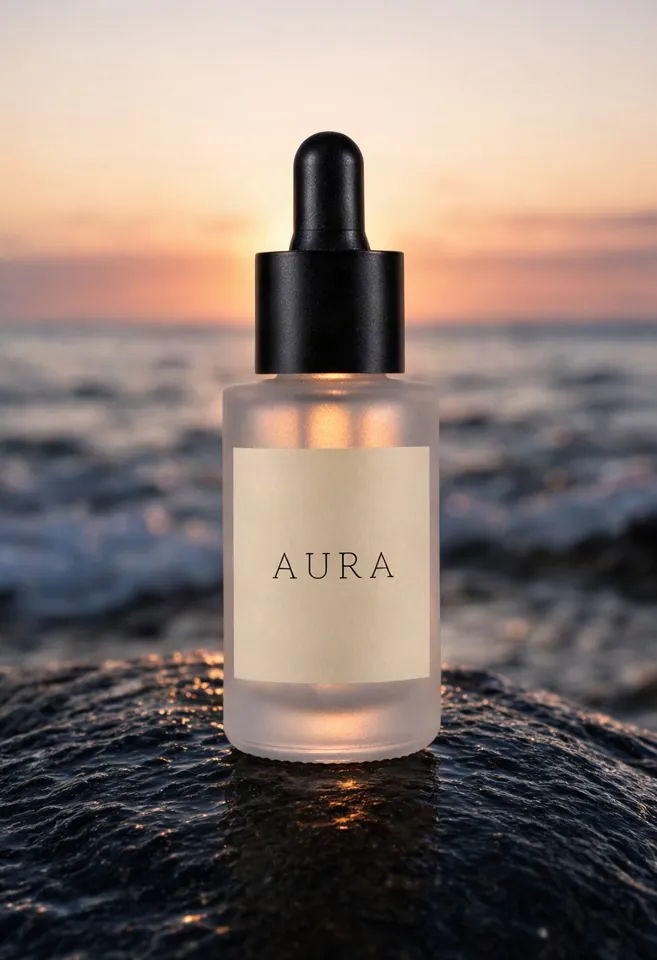
標籤保持了奶油色。副作用是岩石和海面也變了,因為指令變了,畫面也會變。想保留喜歡的場景的話,顏色這句最好一開始就寫進去,而不是事後再補。
例 2 和沒做好 2:只換沙發,牆也變了
這次以房間照片為參考,只換沙發的布料。
Change only the sofa upholstery in <image-1> to deep green velvet, including the cushions. Keep the room, the coffee table, the vase, the floor, the light and the camera angle exactly as in <image-1>.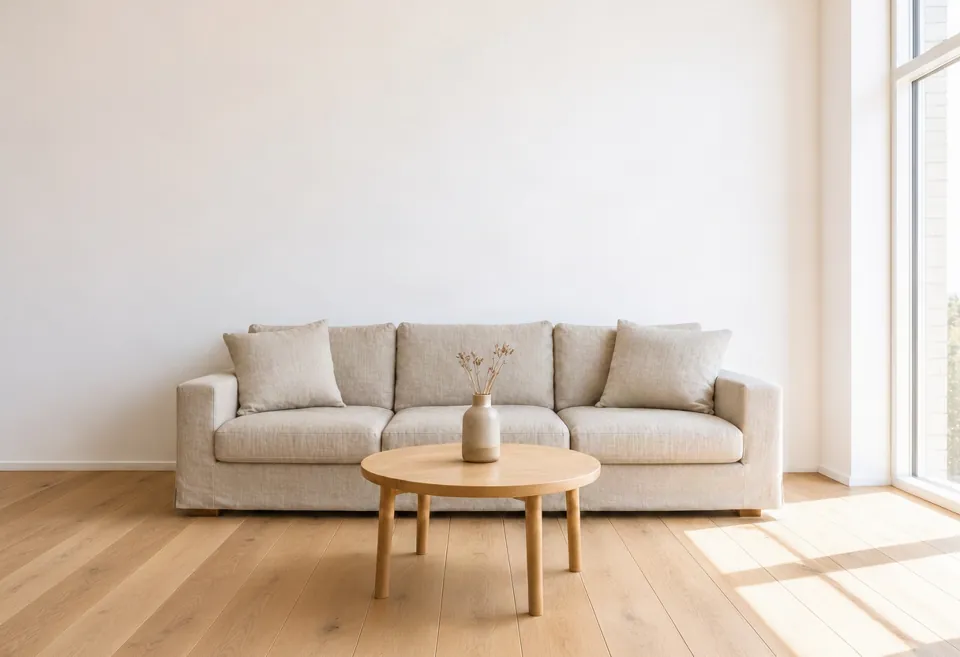
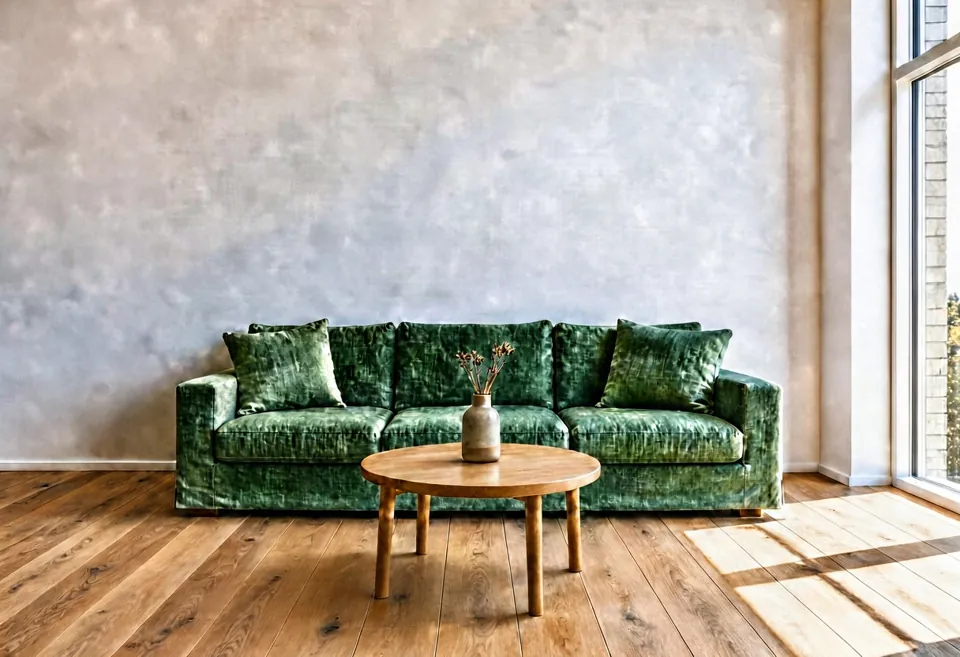
沙發變成了綠色絲絨。可是白色的素牆變成了斑駁的灰色灰泥質感,整張圖的對比也變強了。而指令裡寫了「房間保持不變」。
我們加了一句關於牆的話,重新產生:
Change only the sofa upholstery in <image-1> to deep green velvet, including the cushions. Keep the room, the coffee table, the vase, the floor, the light and the camera angle exactly as in <image-1>. The wall stays smooth plain white paint with no texture.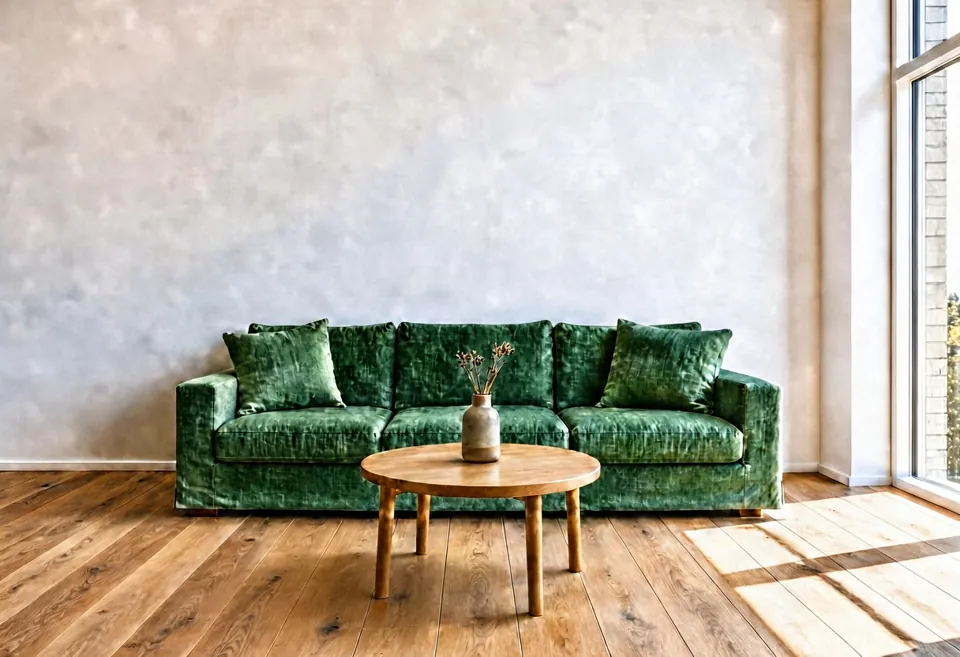
沒有修好。在我們的測試中,這個工具會重畫整張圖,所以改房間裡的一樣東西,其他部分也可能跟著變。把商品放進新場景(例 1)比只修改照片的一部分合適得多。如果只想改一個區域,用塗抹來指定區域的工具,例如尋找取代,是另一個辦法(這張圖我們沒有測試)。
例 3 和沒做好 3:兩張圖合成後沒有陰影
用兩張參考圖,可以把商品放進指定的房間。先加瓶子,再加房間,瓶子就是 <image-1>,房間是 <image-2>。
Place the bottle from <image-1> on the round wooden coffee table in <image-2>, next to the vase, at a natural size for a 30 ml bottle. Keep the room from <image-2> and the bottle and AURA label from <image-1> unchanged.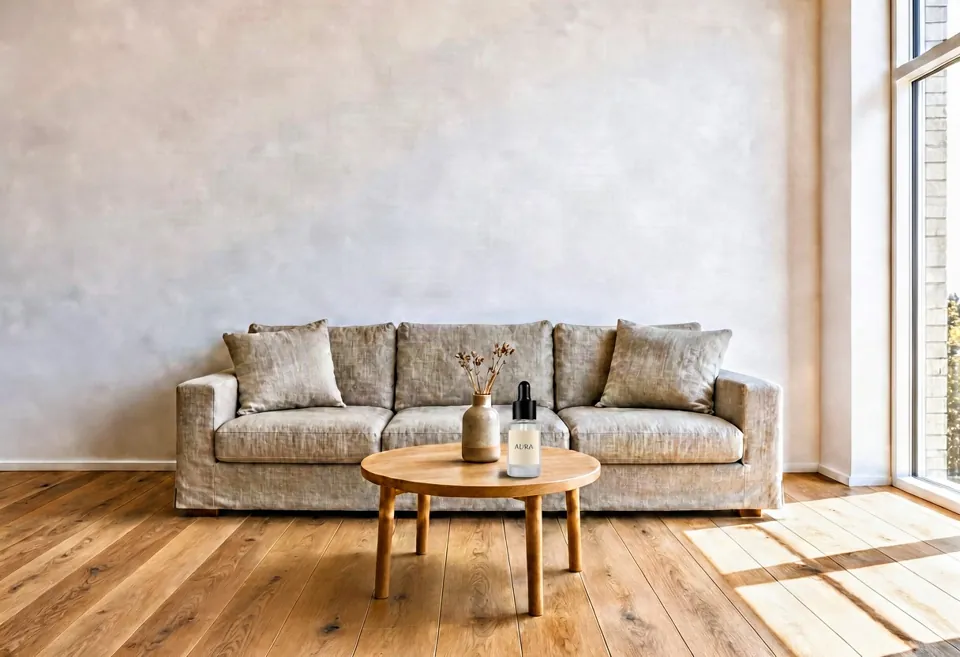
瓶子以合理的大小放在茶几上,標籤也看得清楚。問題有兩個:瓶子下面幾乎沒有陰影,看起來像貼上去的;牆和例 2 一樣變了。
總結:設定和指令寫法
- 適合:保留商品外形和標籤,放進新場景。
- 不太適合:只改房間照片的一部分,其他部分也可能變。
- 要保留的東西一定寫出來:外形、瓶蓋、標籤、顏色。用
<image-1>說明是哪張圖。 - 容易被光改變的顏色(白色、奶油色、品牌色)在第一次的指令裡就寫明。
- 比例:方形 1024×1024,直式 832×1216,橫式 1216×832。
- 點數:1 張參考 20,2 張 30,4 張 50。Starter 方案以上。
可以用你自己的商品照片,在參考圖生成裡試試。